
In this article I will show you how to add drivers to a boot image in SCCM. The method I will show you below will also work with Microsoft WDS.
I will cover how to do it and also the best practices you should follow when doing this.
Why Add Drivers To Boot Image
In my experience you will only ever need to add a storage driver or a network driver in to the boot image.
The reason is because the task sequence will failed because it either can not locate the hard drive (If you get error 0x80070490 check out this article), or it can not get an IP address because WinPE can not detect a connected network device.

Injecting drivers in to the boot image will only affect the task sequence when it boots in to WinPE.
How To Add Drivers to Boot Image In SCCM
To add drivers in to the SCCM boot image follow these steps
Step 1 : Backup Boot Image
The first thing I like to do before updating any boot images is to backup the existing image so we can roll back to it if needed.
To backup the boot image follow these steps
- Open the SCCM console
- go to \Software Library\Overview\Operating Systems\Boot Images
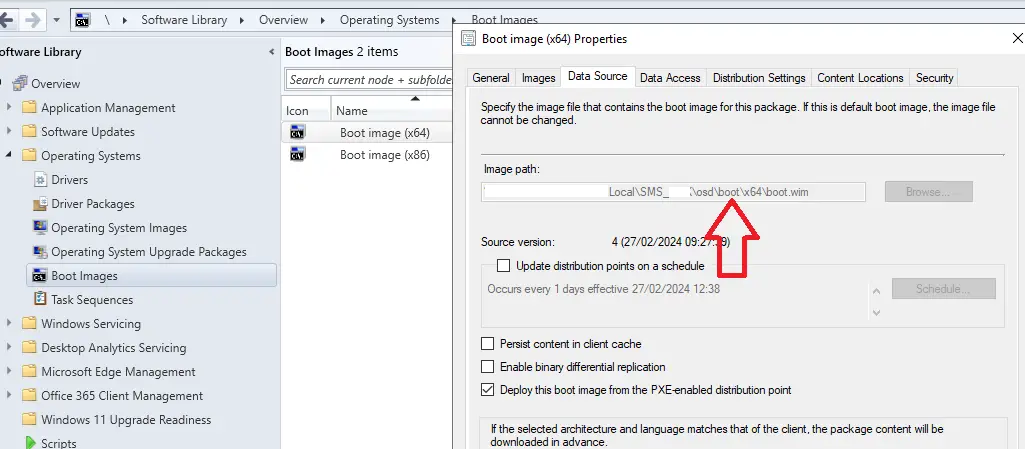
- Right click on the boot image you want to update and select properties
- Click the Data Source tab

- Browse to the unc path that is shown in Image path
- I recommend to copy all the files in the boot folder
- Paste in to a separate folder
Step 2 : Import Drivers In To SCCM
You will need to add the network or storage driver in to the SCCM console before we can add it to the boot image.
We will need to add the driver in to a SCCM driver package at \Software Library\Overview\Operating Systems\Driver Packages
For a full guide on how to do this step take a look at this article I wrote
Step 3 : Create New Boot Image
In my experience it is better to create a new boot image rather than update existing boot images because the existing boot images might already be in use by tasks sequences and updating these images could cause issues with these task sequences.
If you want to update an existing boot image skip to step 4.
To create a new boot image follow these steps
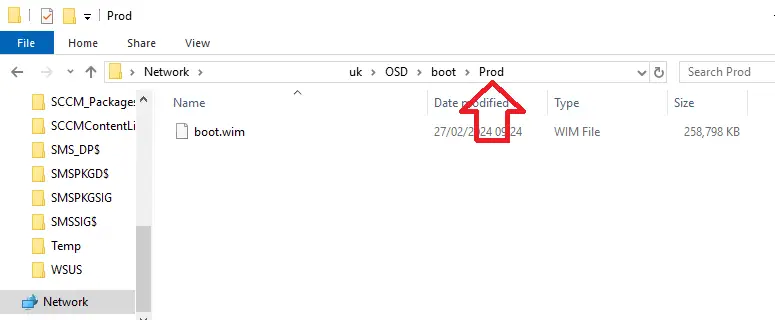
- Copy the boot.wim from step 1 in to a new folder in the boot folder
- Below you can see I have create a Prod folder and copied the boot.wim file in to here

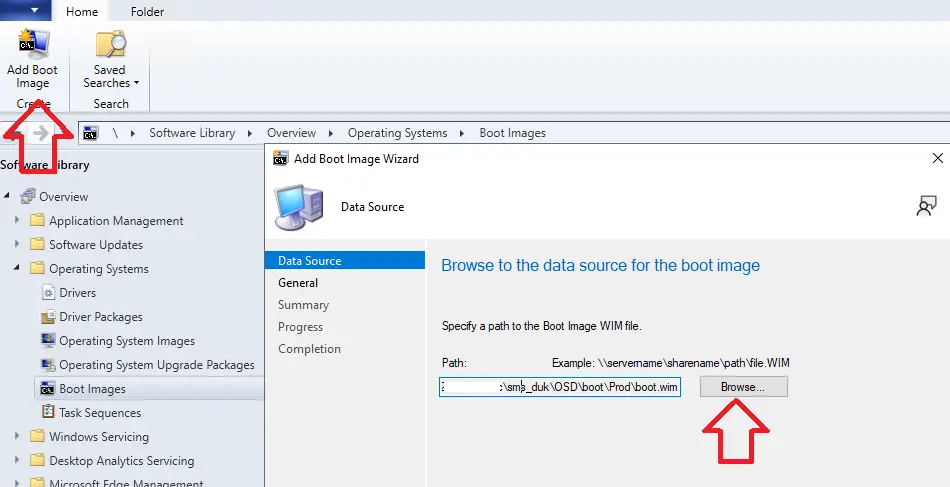
- Open the SCCM Console
- Go to \Software Library\Overview\Operating Systems\Boot Images
- Click Add Boot Image in the toolbar at the top of the console
- Click browse and browse to the boot.wim we just copied to the new folder

- Click next
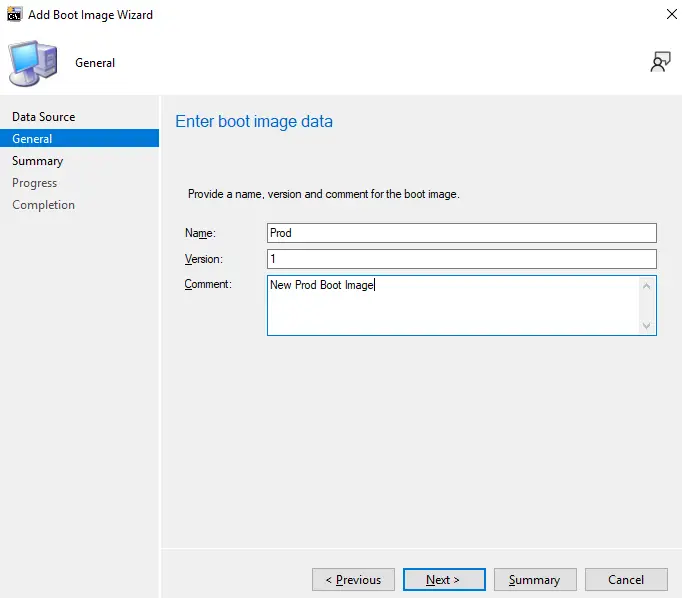
- Enter the information about the boot image as shown below

- Click next
- Click next
- The new boot image will now be created, this usually takes a few minutes
- Click close
- Your new boot image will now be listed as shown below

Step 4 : Inject Driver In To Boot Image
Now we need to inject the driver in to the boot image. To do this follow these steps
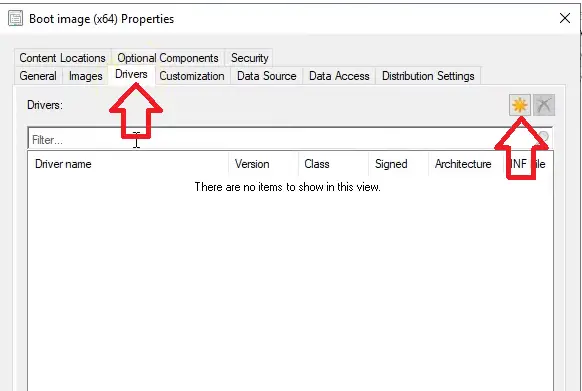
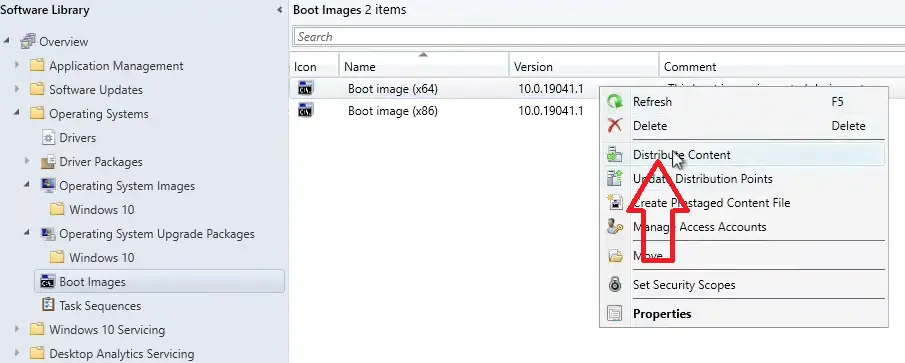
- In the SCCM console go to \Software Library\Overview\Operating Systems\Boot Images
- Right click on the boot image you want to inject the driver in to and select properties
- Click the drivers tab
- Click the sun icon

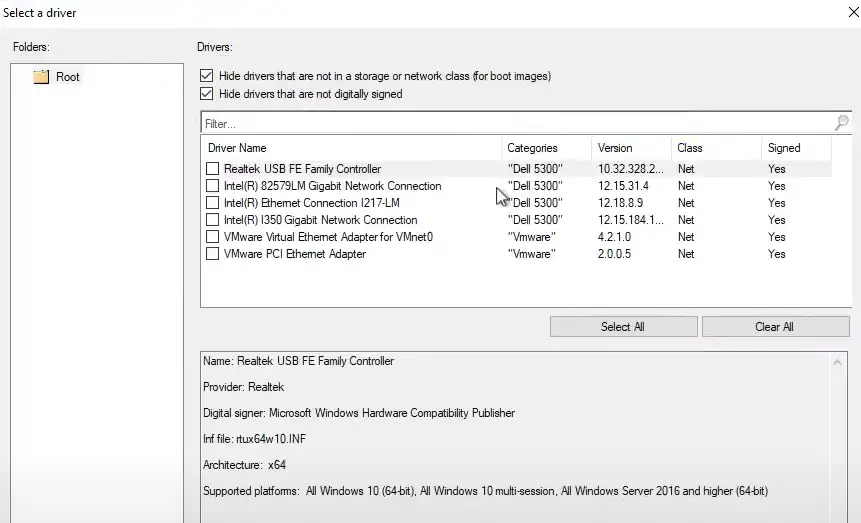
- On the next page only select the drivers you need

- Click ok
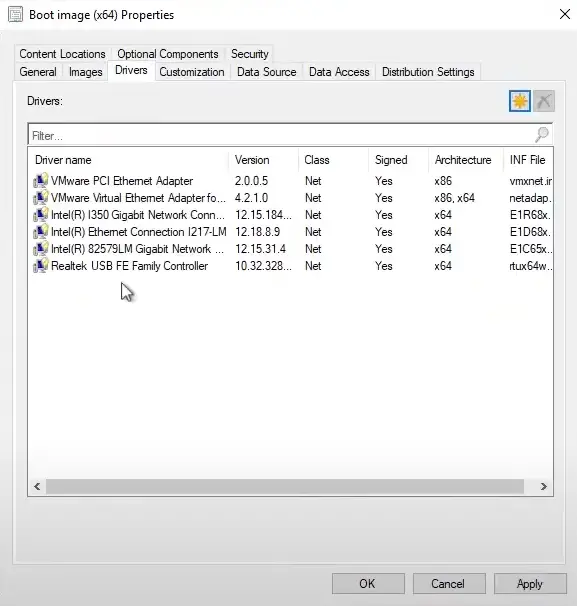
- Listed in the drivers tab will be all the drivers that will get injected to the boot image
- Review all the drivers on the list making sure to remove any that are not needed (Very important)

- Click ok
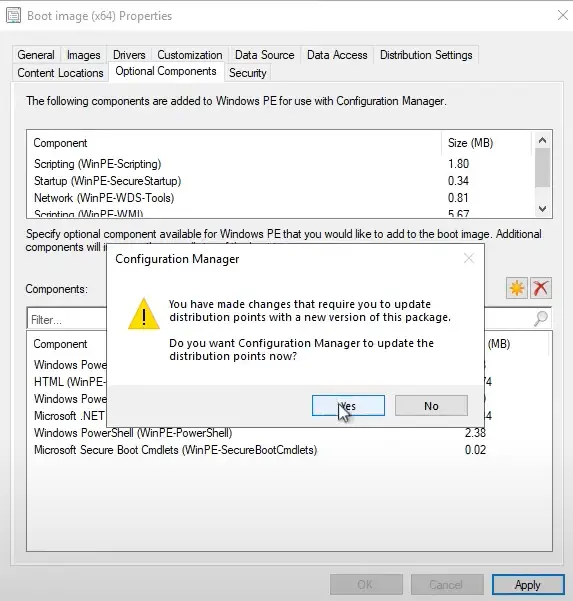
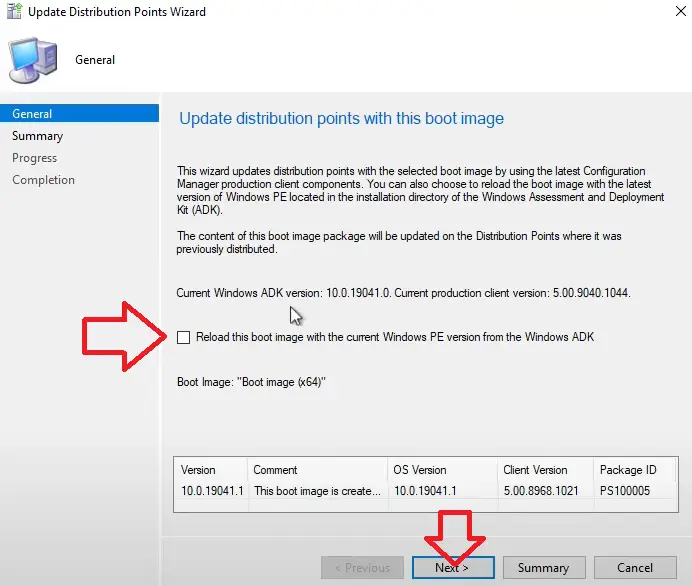
- You will get prompted to update distribution points
- Click yes

- On the update distribution points with this boot image screen tick the box “Reload this boot image with the current Windows PE Version from the Windows ADK”
- Click next

If you need to update Windows ADK to the latest version then take a look at this article on how to do that
- Click Next
- Click close
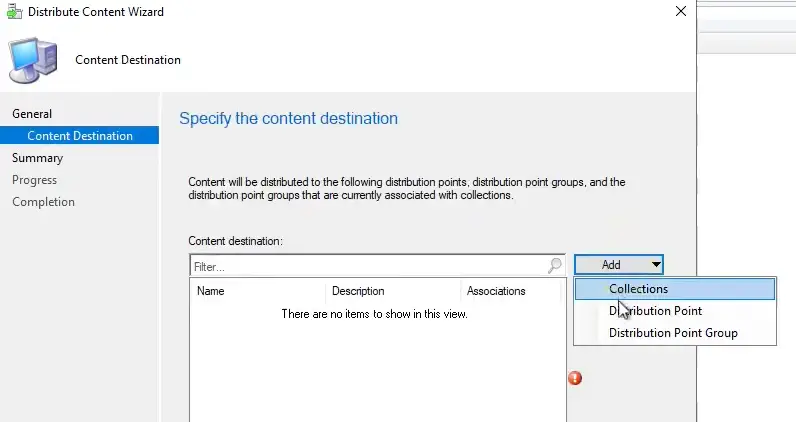
- Right click on the boot image and select distribute content

- Click next
- Select the required distribution points
- Click next

- Click next
- Click close
- Wait for the boot image to distribute
- Confirm the boot image distributed successfully to all distribution points
Best Practices
When it comes to device drivers and boot images there are a few best practices I have learned over the years of working with SCCM which are.
Only Inject Network & Storage Drivers
I have only ever needed to inject network and storage drivers in to the boot image. I have never had any other issues such as display not working, image not applying and so on.
Don’t Add Drivers For New Hardware
If you have a new hardware model you need to add to your SCCM don’t add the drivers in to the boot image.
Add the hardware model device driver to the task sequence (Guide Here) but not in to the boot image.
I recommend you test the task sequence first without adding the device driver in to the boot image, then if the task sequence fails and the error is related to drivers in the boot image then I would add the drivers.
Create New Boot Image
If you do require to add drivers to the boot image I find it easier to create a new boot image by copying the existing production boot image, then inject the drivers in to this new boot image, then assign this boot image to your task sequence.
This way if there are issues with the new boot image you can quickly roll back to the known working boot image,