
In this article I will cover everything you need to know about installing and configuring the software update point in SCCM.
The software update point role enables SCCM to be able to download and push out software updates to SCCM clients.
In this article I will show you the best practices in setting up a software update point.
Prerequires
Before you can install the software update point role the following prerequires need to be met.

- WSUS needs to be installed : Needs to be installed on the SCCM primary site server (I highly recommend this). I wrote a step by step guide on How to Install & Configure WSUS
- WSUS administrative console : Only needs to be installed if WSUS is not installed on the primary server. You will need to connect to the remove WSUS server before installing the software update point on the primary server
- Software Update Point Role install on primary site first : Then install on secondary site servers
- Disk space : I recommend Min 5gb, recommended 10gb for every product you want to push out software updates to
Once the prerequires have been met you can proceed to the next step
Install Software Update Point
If you are installing the software update point for the first time you will need to install the role on the primary site first, then the secondary site servers if you have any.
To install the software update point follow these steps
- Open the SCCM console
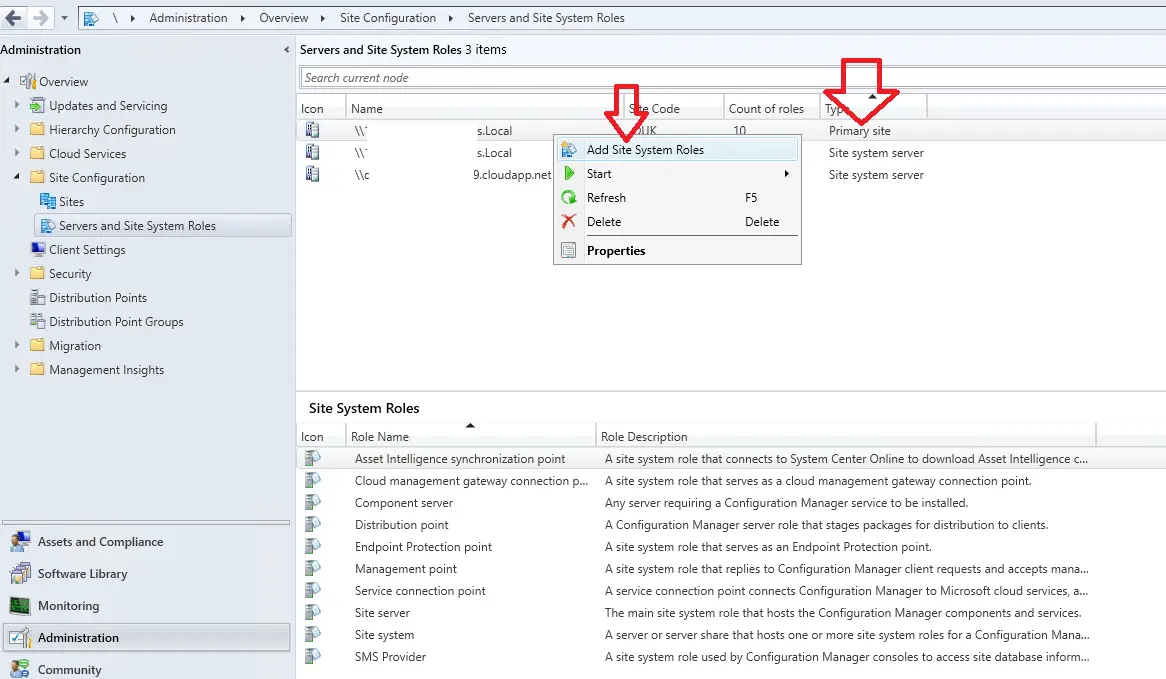
- go to \Administration\Overview\Site Configuration\Servers and Site System Roles
- Right click on the server that has the primary site role and click add site system roles

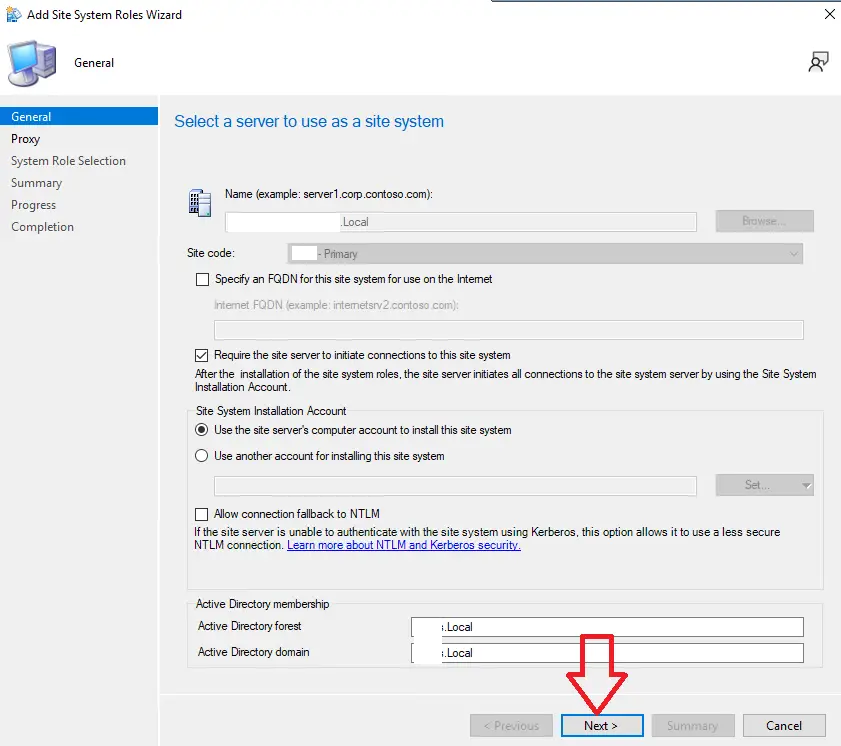
- On the add site system roles wizard page click next

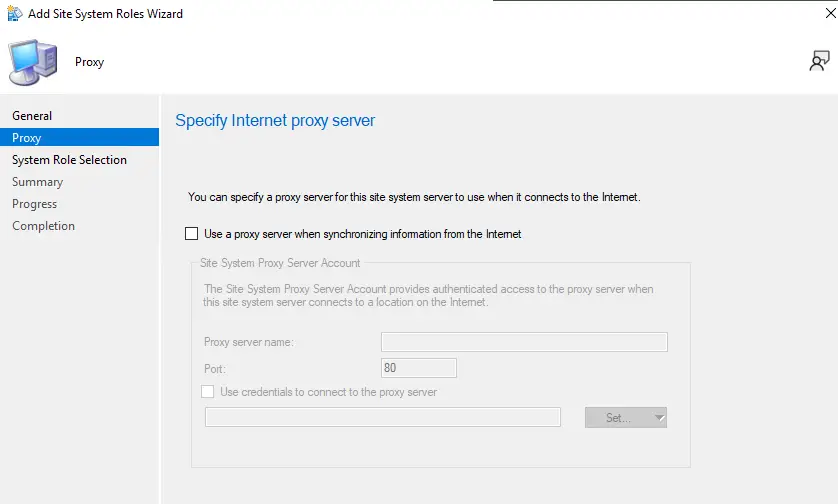
- If you use a proxy to access the internet enter the details here
- Click next

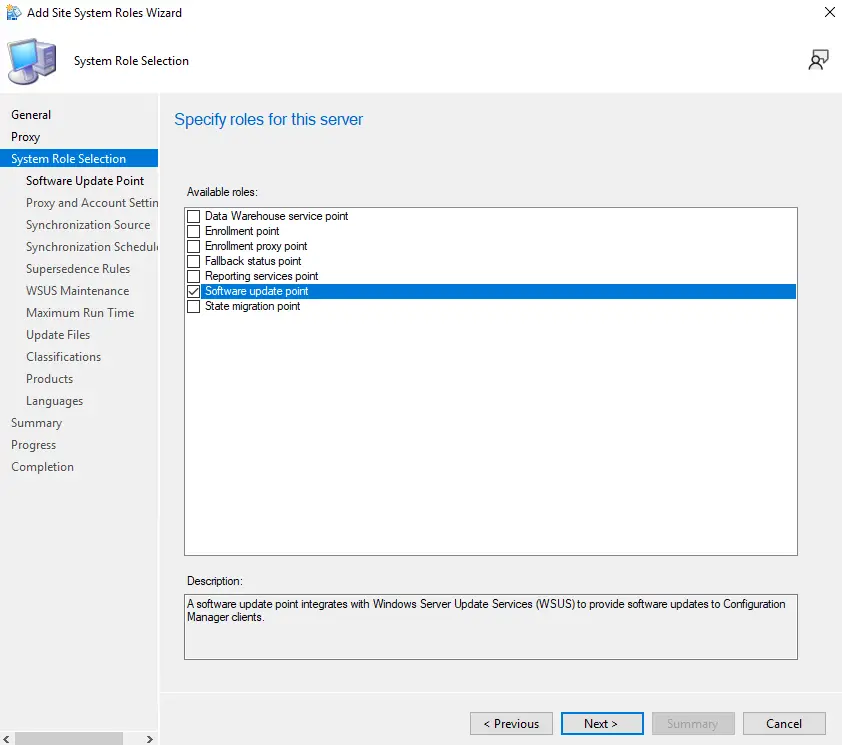
- At the specify roles for this server page select the “Software Update Point” role and click next

- If WSUS is installed on another machine you will need to install the WSUS administrative console on the primary server and have connected to the remote WSUS before you start the add software update point role wizard
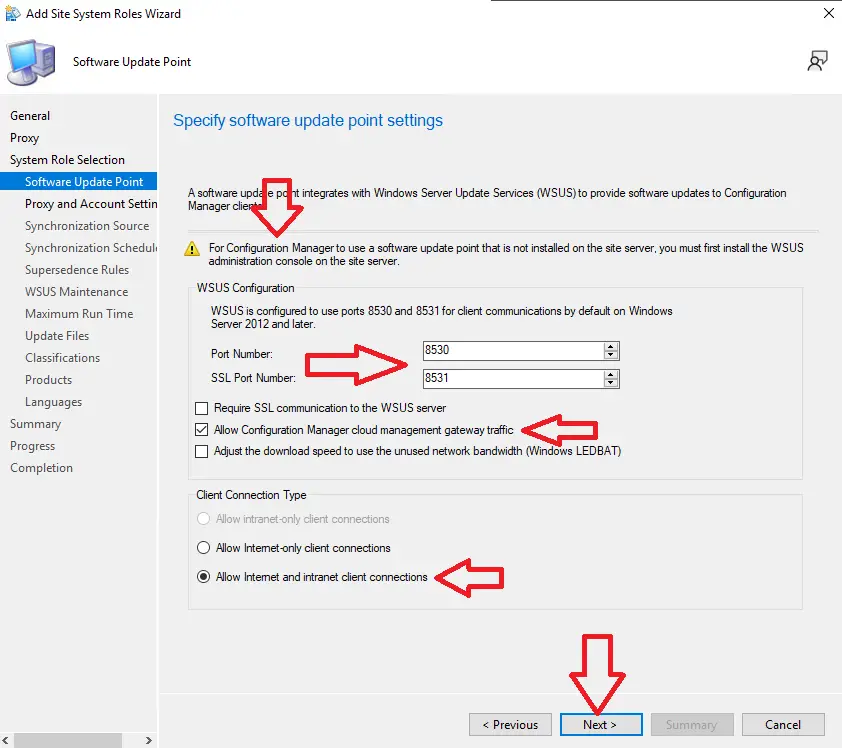
- Confirm the ports are correct, if you are unsure what port your WSUS is using check out this article I wrote on how to check what port WSUS is using
- If you are using a CMG (Cloud Management Gateway) then tick the box “Allow configuration manager cloud management gateway traffic”
- If you are using a CMG also select “Allow internet and intranet client connections”
- Click next

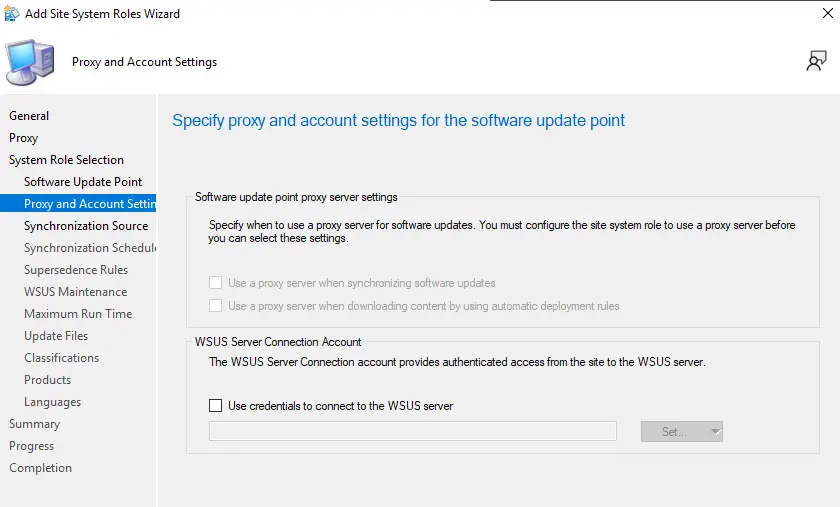
- If you need credentials to connect to a WSUS server enter them here
- In my experience I highly recommend that you install WSUS on the SCCM primary site server and not use credentials to connect to WSUS as this reduces the risk of software updating having issues in the future such as account password changed / locked out
- Click next

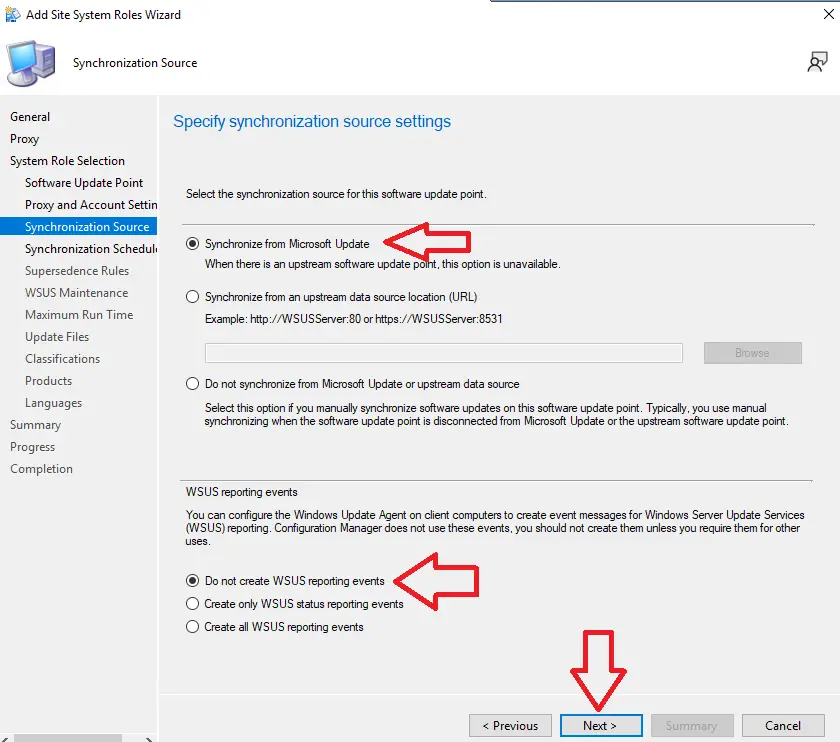
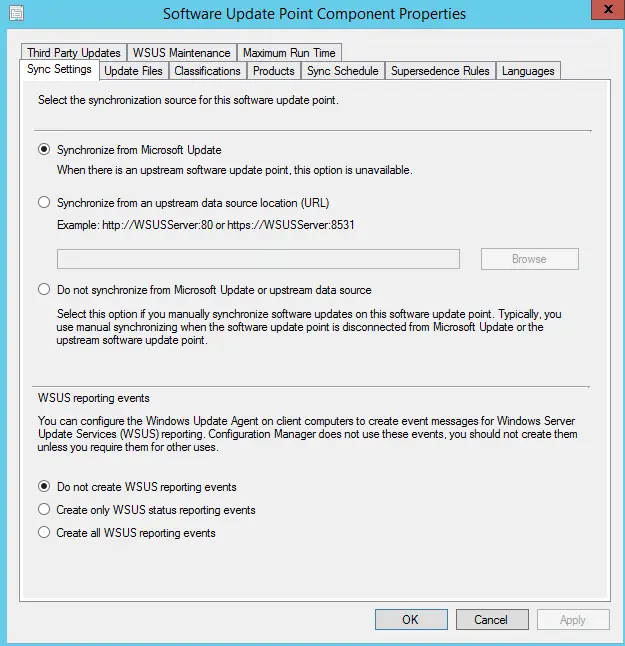
- Select “Synchronize from Microsoft Update”
- Select “Do not create WSUS reporting events”
- Click next

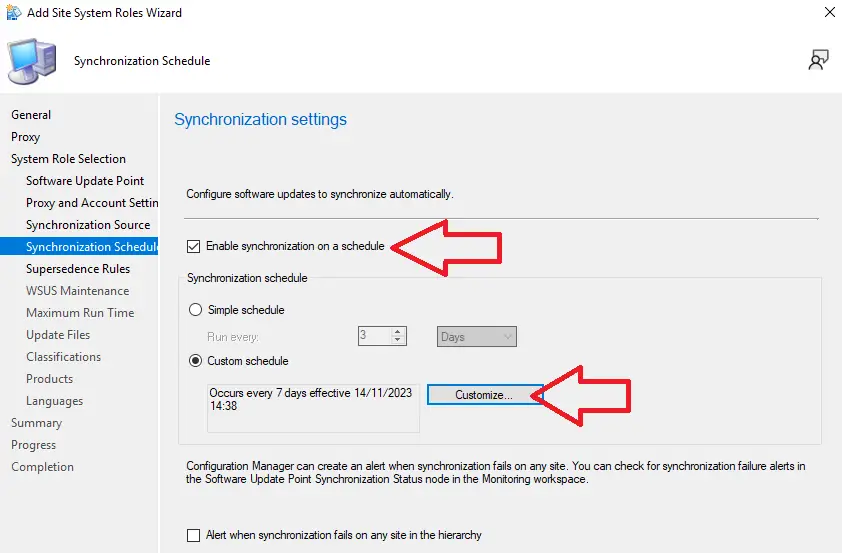
- We want software updates to automatically appear in the SCCM console when they are available, to do this tick the box “Enable synchronization on a schedule”
- Click on customize

- This is where we need to start thinking about timings of things. We configured WSUS to check for updates every day at 23:30. The first WSUS sync I did took 1 hour (Further syncs should take 10-30 minutes) So we need to configure this setting for at least 1 hour after the WSUS sync. In my experience it is best to give extra time for the WSUS sync to finish.
- Set the time to 01:00
- Set recur to every 1 days
- Click ok

- Click next
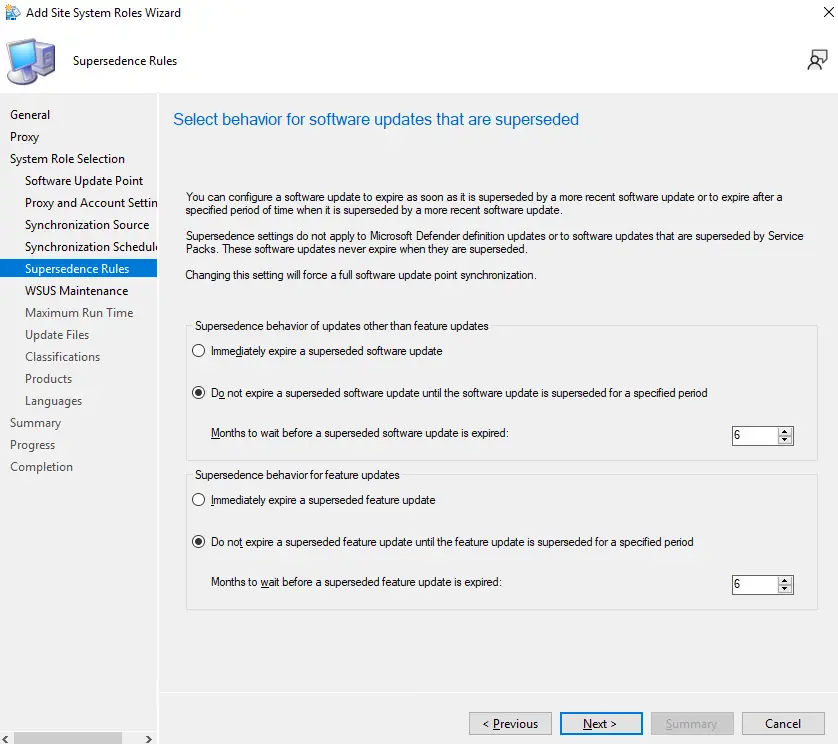
- On the “Select behavior for software updates that are superseded” I recommend to leave these settings at default values
- Click next

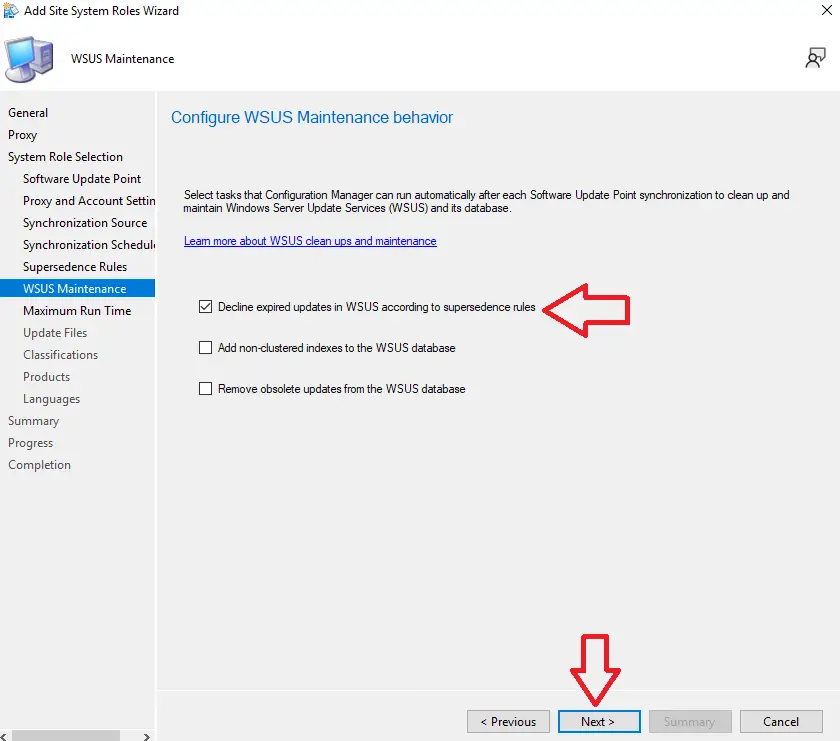
- Tick the box next to “Decline expired updates in WSUS according to supersedence rules”
- Click next

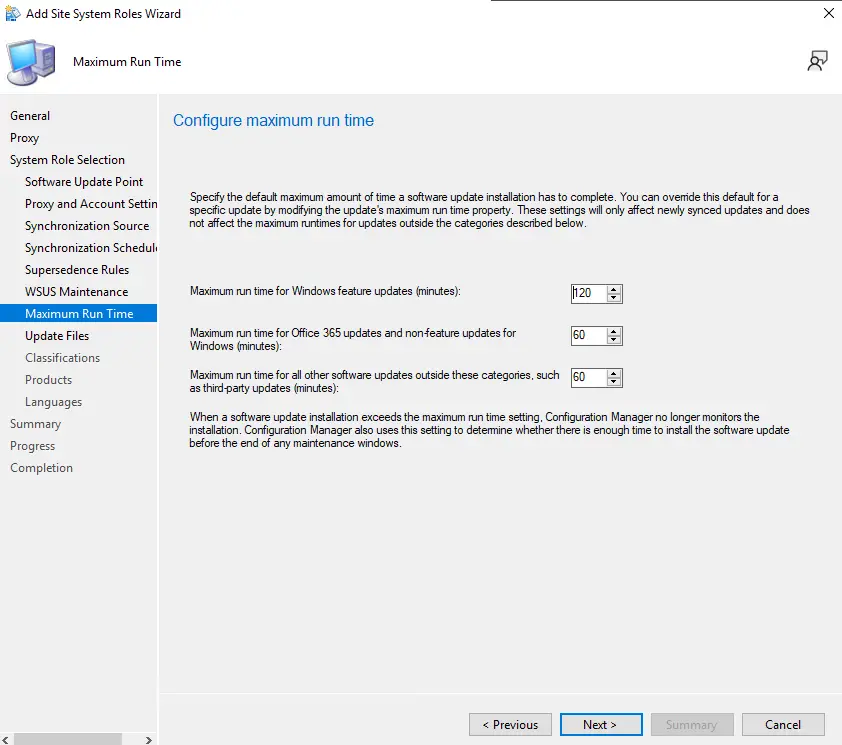
- I recommend to leave the maximum run time to 120 minutes.
PRO TIP : When we configure the deployment of the software updates we will get the client to pre-download the update before they install the update, this will eliminate maximum run times issues.
- Click next
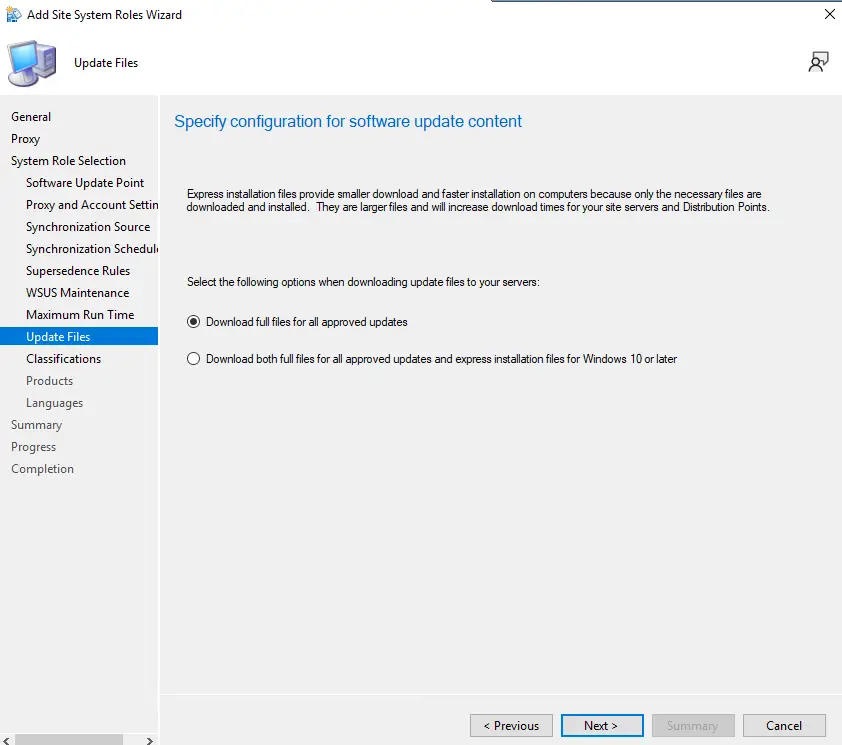
- On the specify configuration for software update content window leave the default value “Download full files for all approved updates”
- Click next
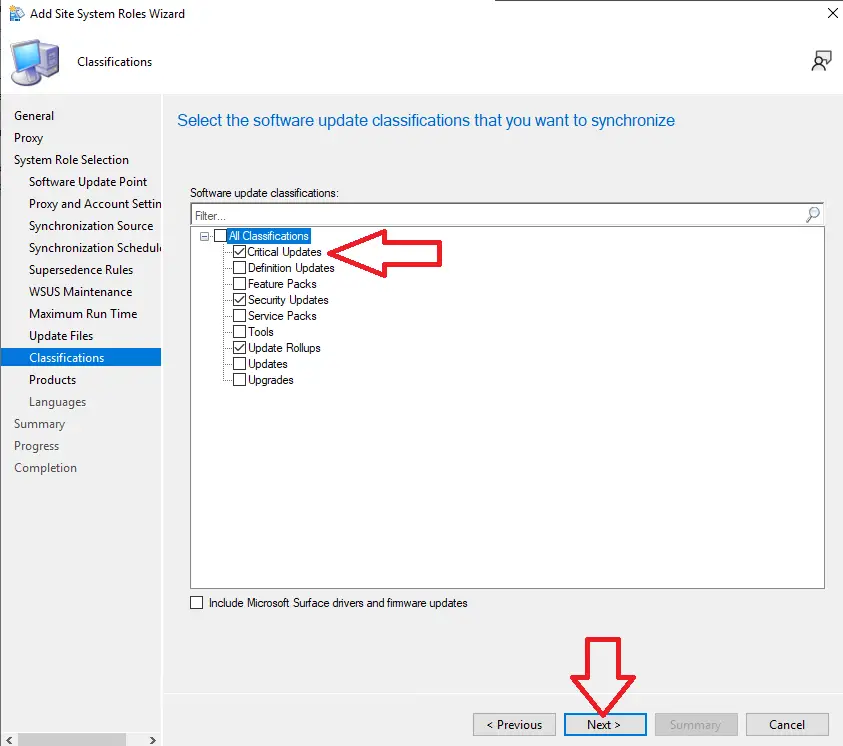
- Select the same software update classifications you entered in WSUS
- Click next

- Same as previous step, only select the products you selected in WSUS
Pro Tip : If you select a product here in the SCCM console but do not have it selected in WSUS no software updates will get downloaded for that product
- Click next

- Only select languages here that have been selected in WSUS
- Click next

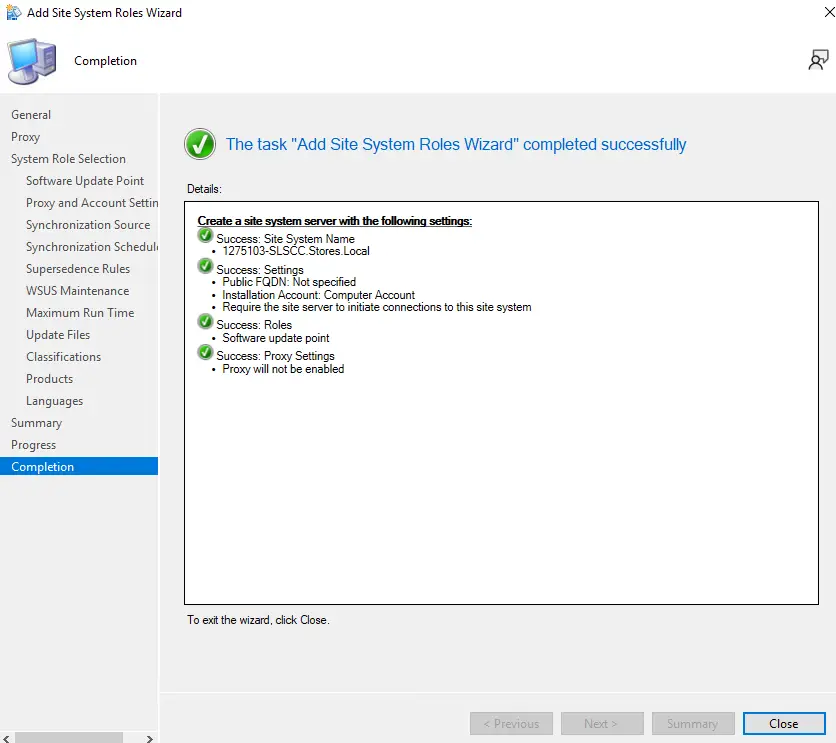
- At the summary screen confirm the details and click next
- We have now completed adding the software update point roll
- Click close


Post Software Update Point Checks
Now we have installed the SCCM software update point role it is very important that everything installed correctly and that everything is healthy before we continue to configure the software update point role.
To do this perform these tasks
Check For Successful Install In Logs
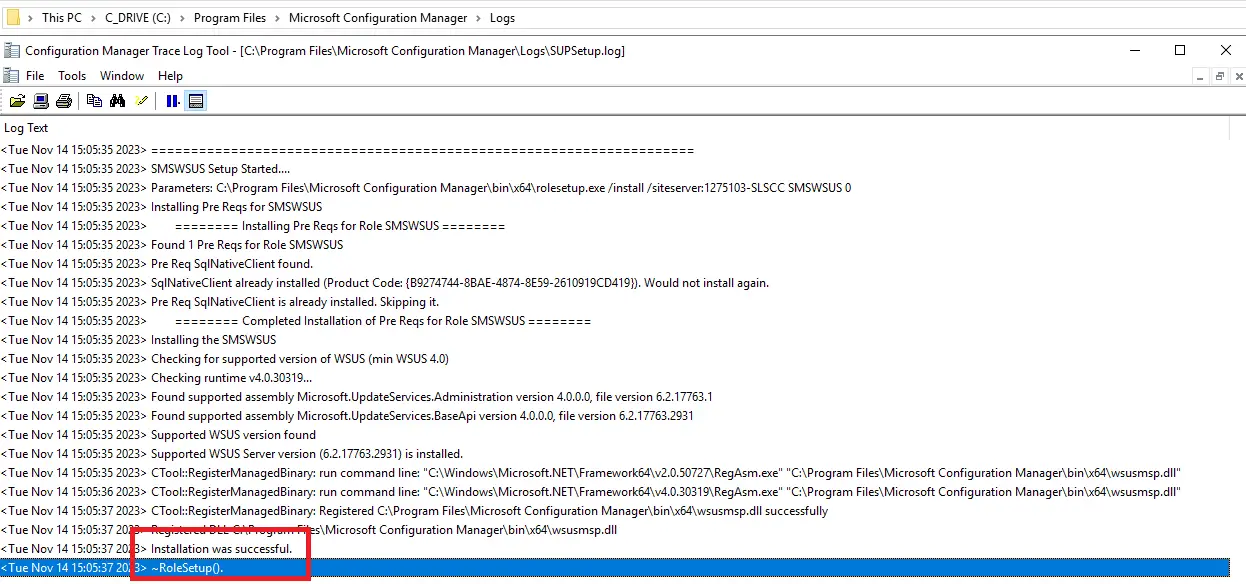
Firs thing we need to do is open the SUPSetup.log log which is usually located at C:\Program Files\Microsoft Configuration Manager\Logs and check for the following lines
- <Tue Nov 14 15:05:37 2023> Installation was successful.
- <Tue Nov 14 15:05:37 2023> ~RoleSetup().
If you see these then the install was successful. If not you should see a few errors which will help you to find the root cause of the why the software update point role failed.
Check Active Alerts
Check the active alerts section to see if there are any alerts relating to software updates, To do this follow these steps
- Open SCCM Console
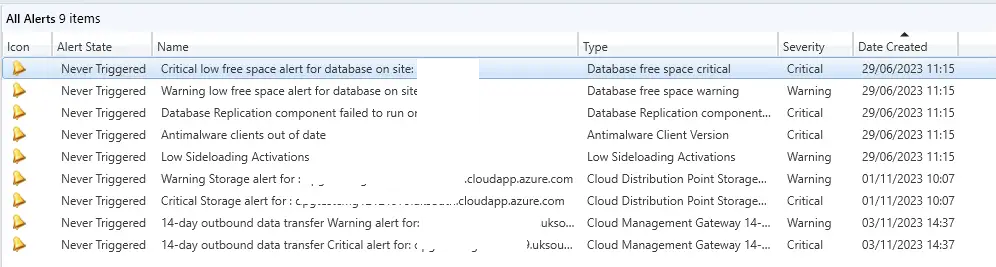
- Go to \Monitoring\Overview\Alerts\All Alerts
- Check if any alerts were triggered and still active relating to software updates
- In my example below I saw no alerts had been triggered for around 5 months 🙂
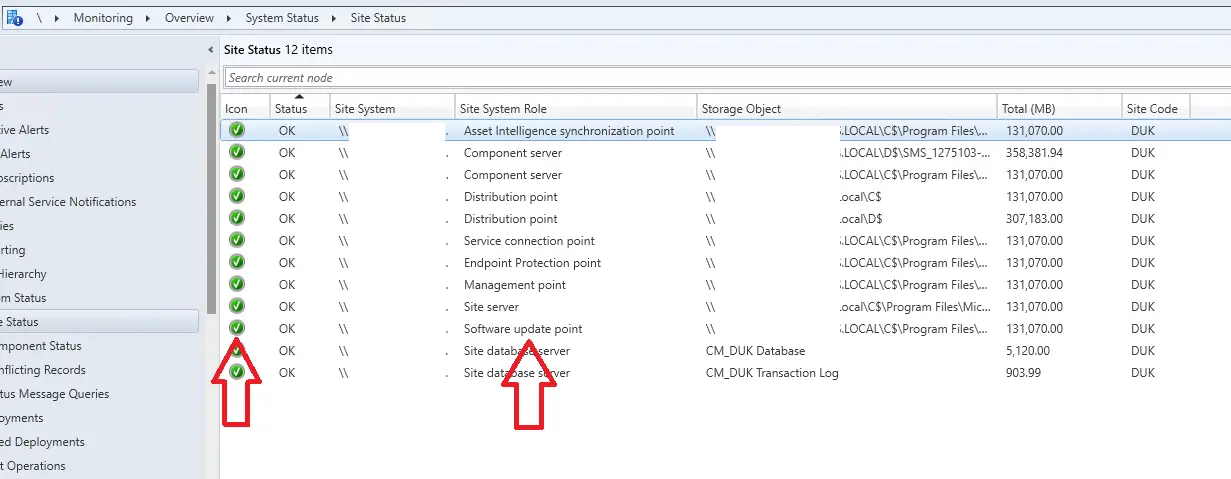
Check Site Status
Check the Software update point site status is healthy, to do this follow these steps
- Open SCCM Console
- Go to \Monitoring\Overview\System Status\Site Status
- Confirm there is a green circle and OK on the software update point line
Check Free Disk Space
Make sure you have enough disk space to download the software updates to. I recommend 10gb of disk space per product

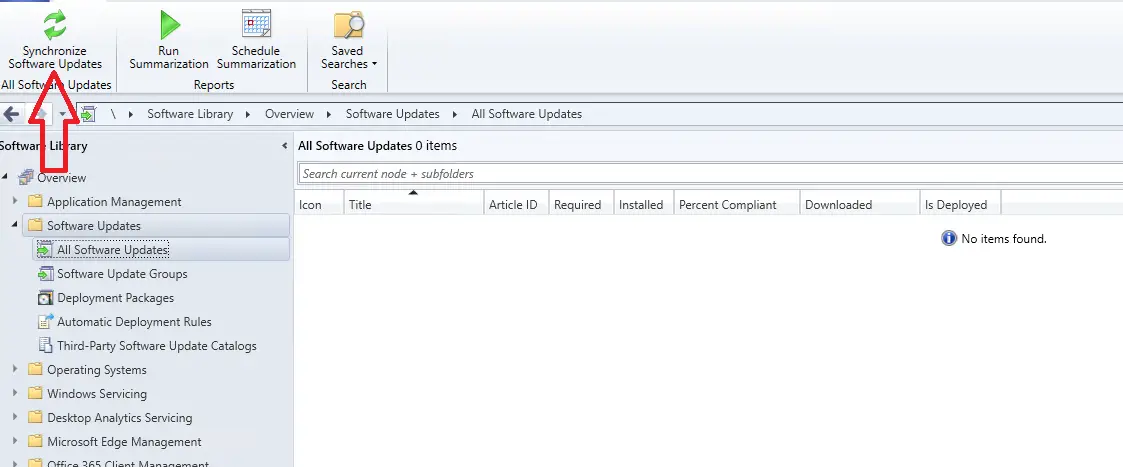
Run First Synchronize of Software Updates
We now need to run the first synchronize of software updates, To do this follow these steps
- Open SCCM Console
- Go to \Software Library\Overview\Software Updates\All Software Updates
- Notice there are 0 software updates found
- Click on “Synchronize software updates”

- A message will pop up, click yes
- The sync will now start and in my experience take a few hours to complete
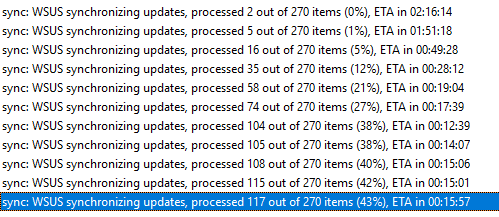
- To check the status of the sync take a look in the log wsyncmgr.log which should be located at C:\Program Files\Microsoft Configuration Manager\Logs
- Below you can see there are 270 software updates to download

- When you see the following the sync is complete
- SMS synchronizing updates, processed 118 out of 118 items (100%)
- Done synchronizing SMS with WSUS Server
- Sync succeeded
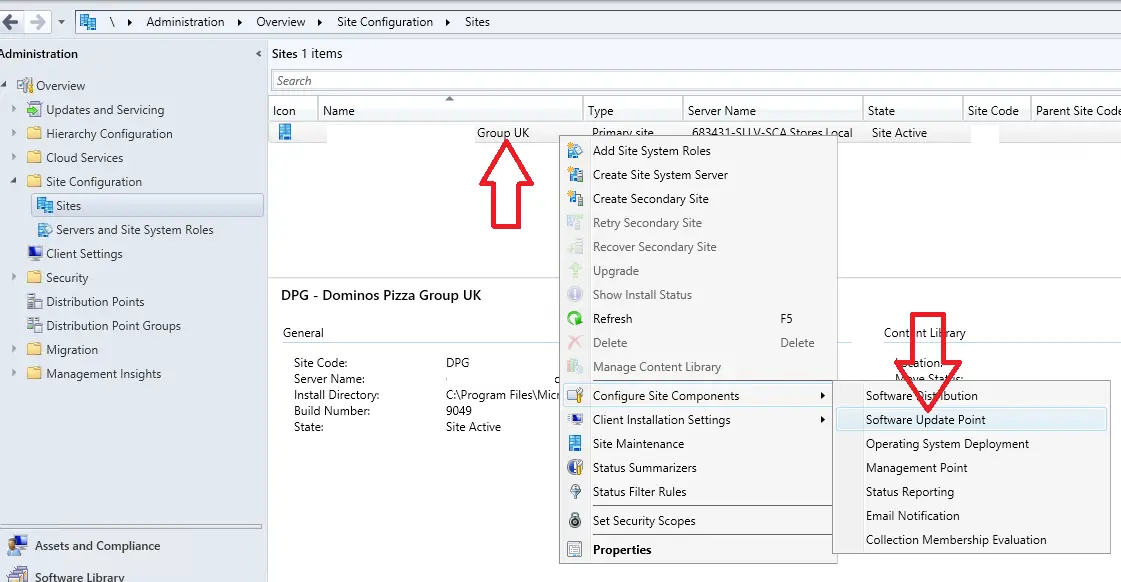
Post Configuration Changes
All the configuration for the software update point was done in the Install Software Update Point if you need to change anything after the install follow these steps
- Open SCCM Console
- Go to \Administration\Overview\Site Configuration\Sites
- Right click on the SCCM primary site server
- Select Configure Site Components > Software Update Point

- You can now edit the relevant settings by clicking on the required tabs

Conclusion
Above I have gone through everything you need to know about setting up and configuring the software update point role within SCCM.
I have also added a few pointers for things that I have learned from experience over the years.
I hope this article has helped you.