
Below I will show you how to skip the welcome to the task sequence wizard when you are deploying a task sequence via SCCM or WDS.
The process is very simple and will only take a minute or two.
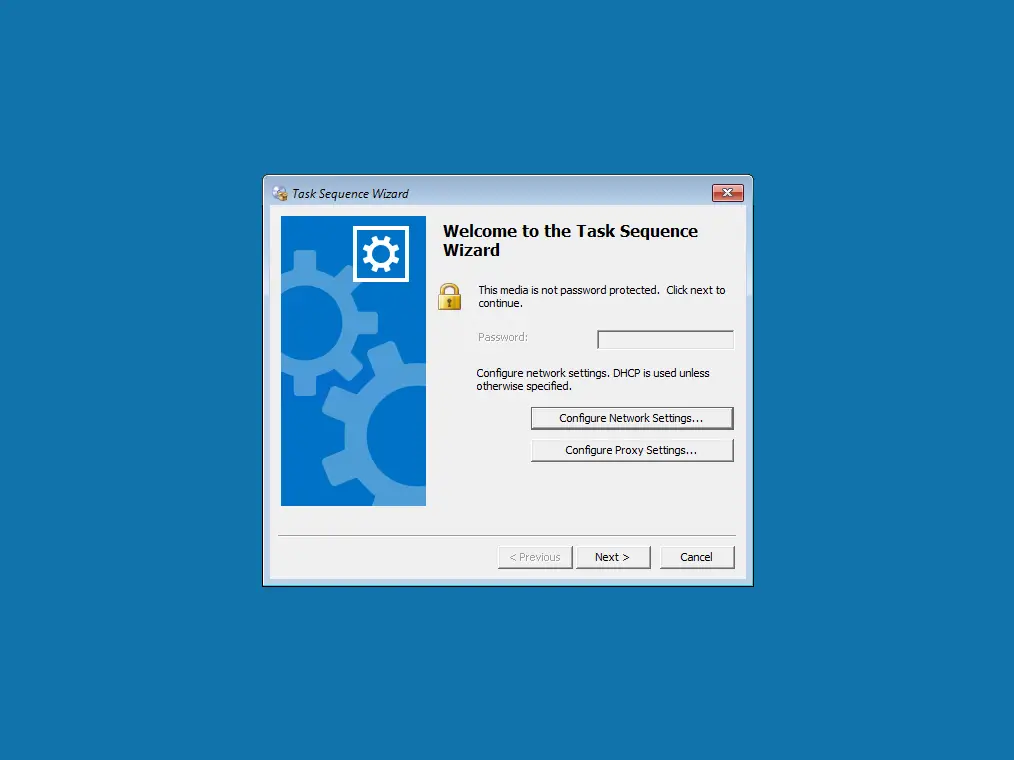
Below is the window that we will supress.

Contents
show
How To Skip Welcome To The Task Sequence Wizard
To skip the welcome to the task sequence wizard we need to make a change to the TsmBootstrap.ini file which is located on your DHCP server.
To do this follow these steps
- Log on to the DHCP server that your clients pxe boot to
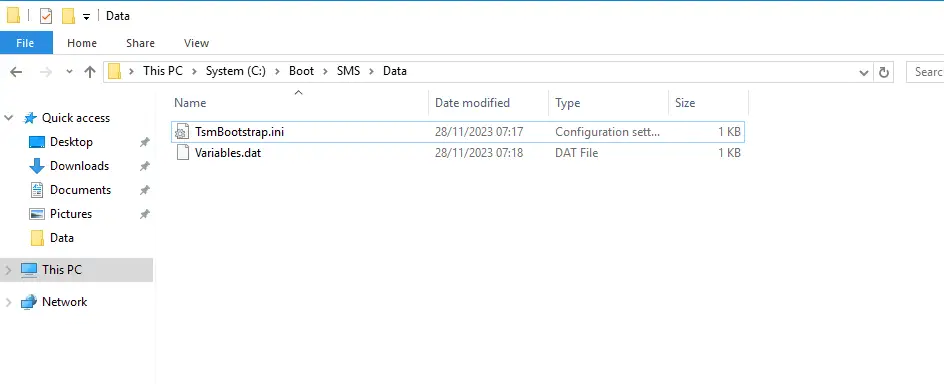
- Browse to *:\Boot\SMS\Data (Usually C:\Boot\SMS\Data)

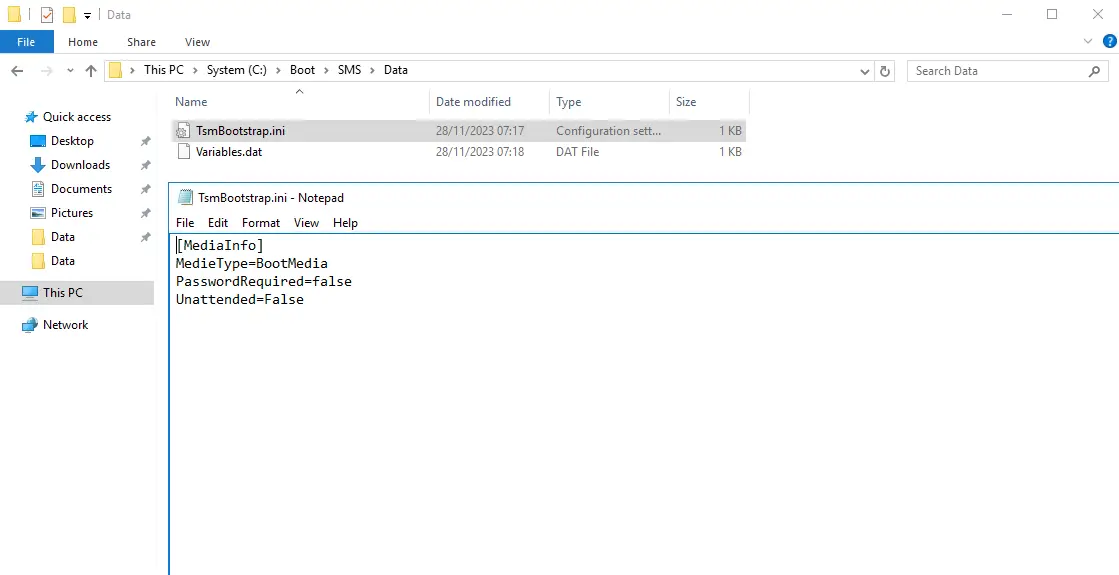
- Open the TsmBootstrap.ini file
- By default the unattended variable will be set to false

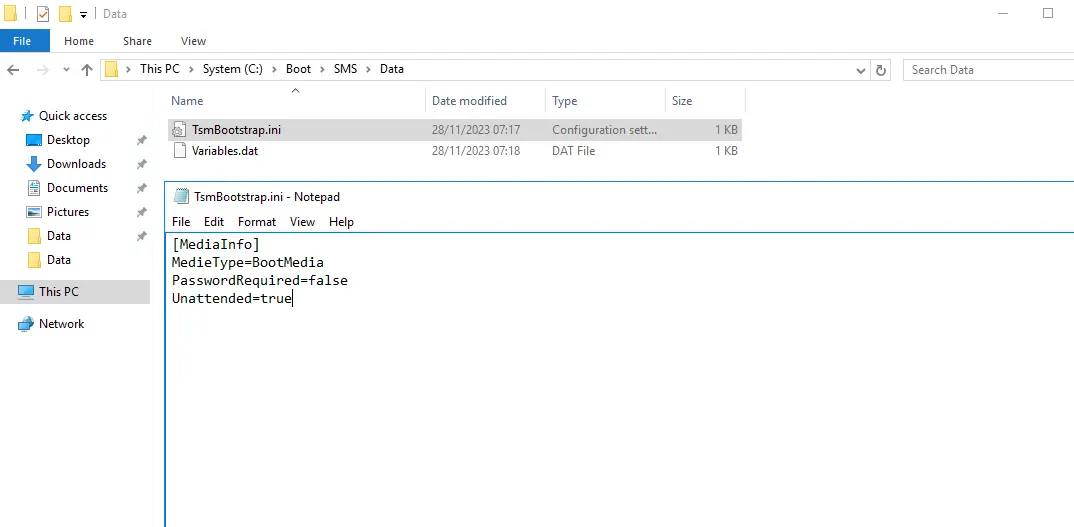
- Change the unattended variable to true

- Save the file
- Now try the task sequence again and the welcome screen will now be supressed
How To Supress When Using USB Bootable Media
If you are using bootable media to boot your clients to the task sequence then use the below steps to supress the welcome screen
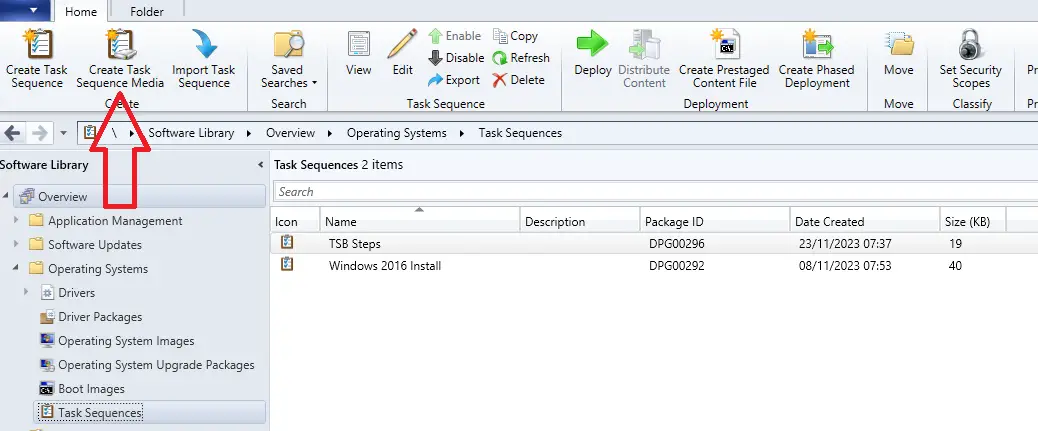
- Open the SCCM console
- Go to \Software Library\Overview\Operating Systems\Task Sequences
- Select “Create Task Sequence Media” in the toolbar

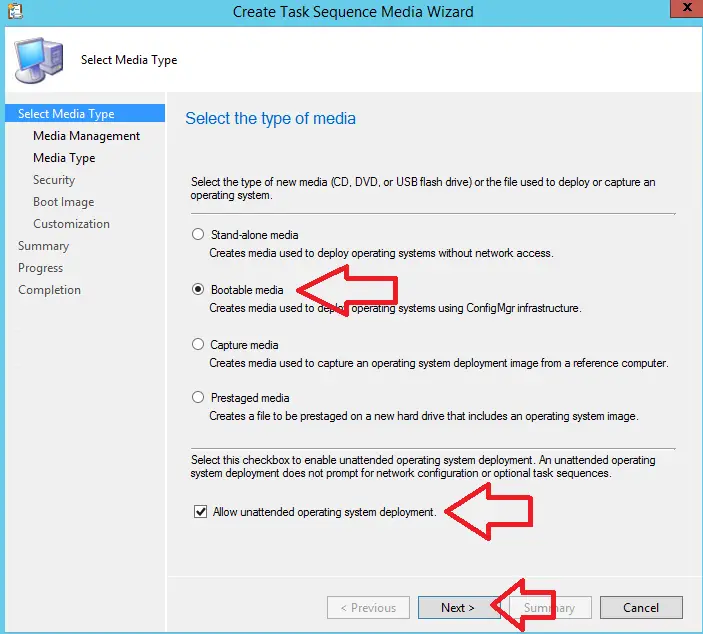
- Select bootable media
- Tick the box “Allow unattended operating system deployment”
- Click next

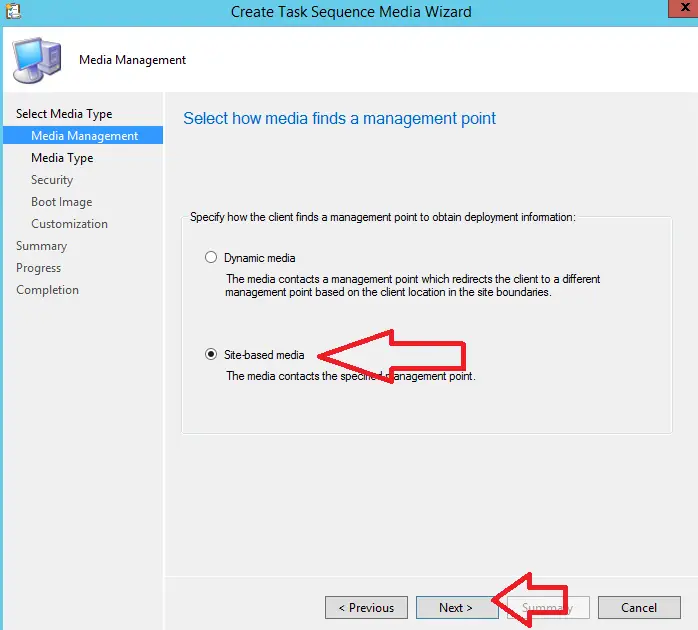
- Select site based media
- Click next

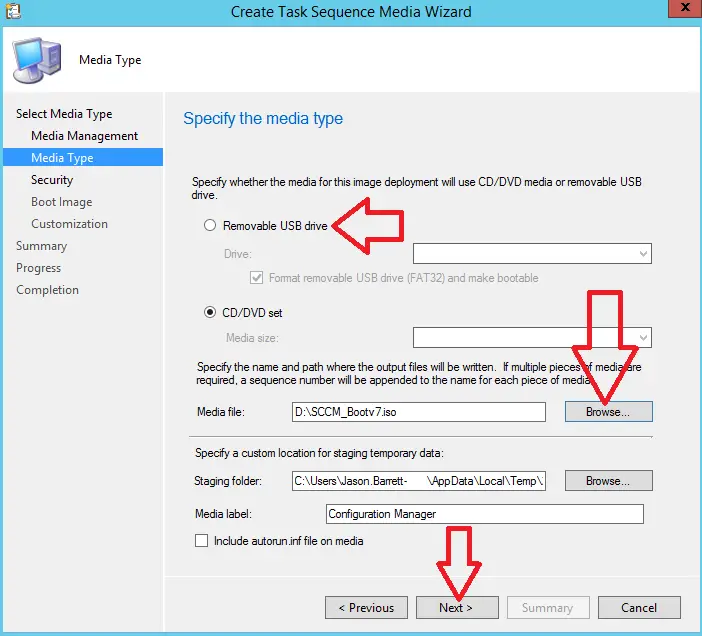
- If you have a USB drive plugged in to the machine select “Removal USB drive”
- Other wise click browse next to media file and specify a name for the bootable media
- Click next

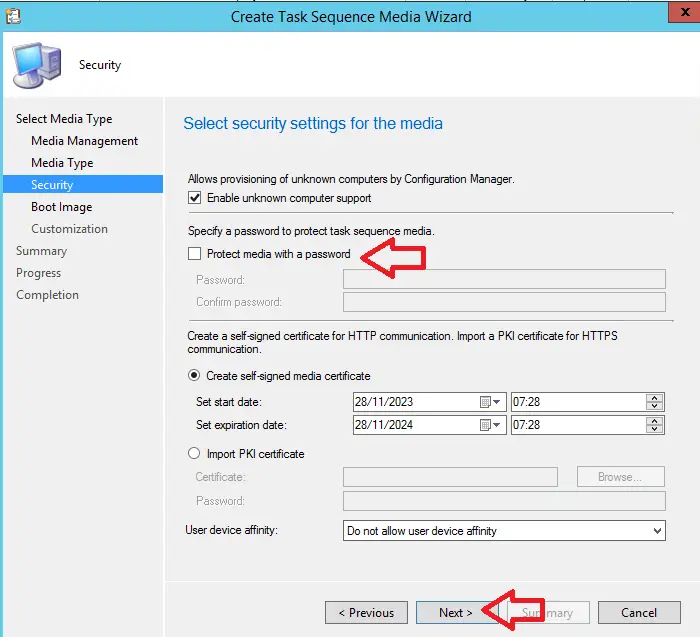
- If you want to password protect the media tick the box and enter a password
- Click next

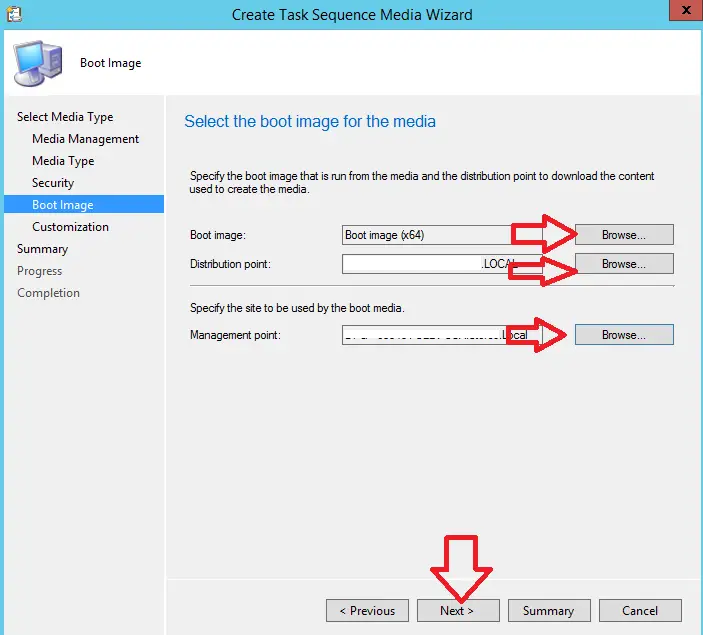
- For the boot image select “Boot image (x64)”
- Select a distribution and management point
- Click next

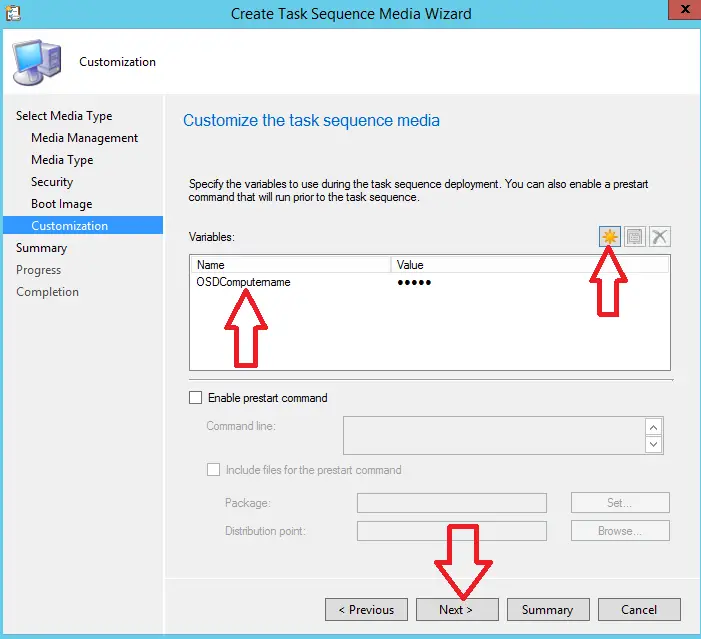
- If you want the task sequence to prompt you for a computer name click the sun icon and add the variable OSDComputername
- Click Next

- Click next
- Click close
Why Keep The Welcome to the Task Sequence Wizard
If you decide to supress the welcome screen then you will lose the option to set a static ip on networks where you do not have DHCP enabled.
Setting static IPs might be needed in certain locations.