
I have seen this issue in every SCCM environment that I have worked on, You set the maximum cache size on a client, but the client always uses more size than what the cache limit is set to?
Is this a bug with SCCM? Why does the client download and store larger files than it should? I will cover everything you need to know below.
The Issue
The reason the C:\Windows\ccmcache folder has files and folders in it that are larger then the cache limit set in your SCCM client policy is that software updates are not restricted by this value.
You can set a cache limit of 5gb, then send a software update package that is 20gb in size and the client will download it because the software update package does not check what the cache limit is.

If you are deploying software updates via sccm check out this guide I wrote which will help you to reduce the size of the software update deployments.
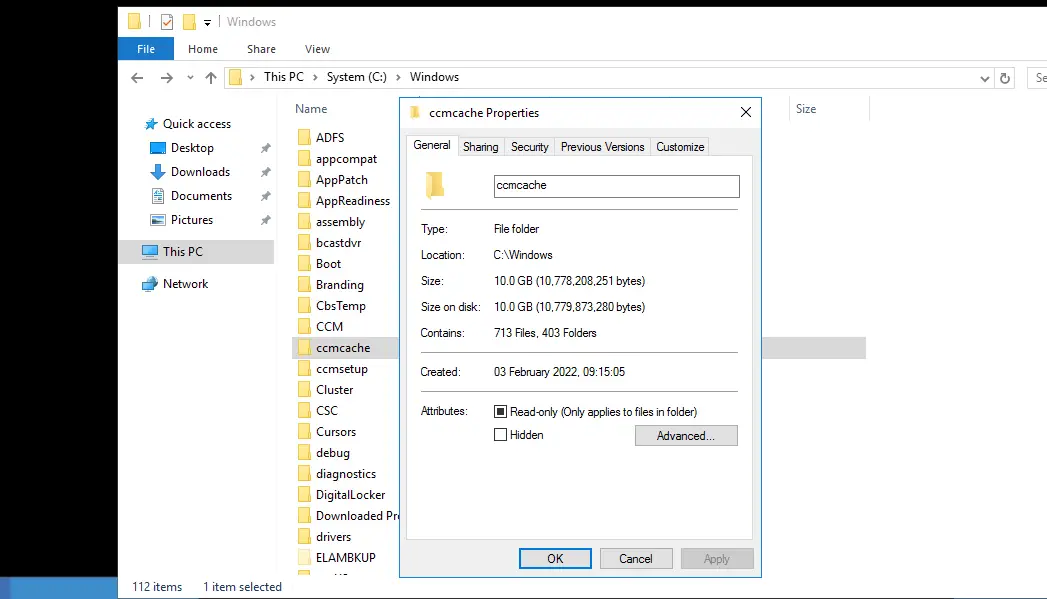
I have just randomly checked one of my SCCM clients, The cache limit is set to 5gb, Below you can see the C:\Windows\ccmcache folder is using 10gb of space.
The Solution
The best way to clear down the SCCM ccmcache Folder is via a powershell script which will remove any cache that is older than a certain amount that we will specify.
You can then use this script in three different ways
- Run the powershell script manually on the SCCM client
- Create a schedule task on the SCCM client to run the powershell script
- Run the powershell script manually from the SCCM Server
I recommend to implement the schedule task as this will then run automatically and you never need to worry about the SCCM Cache folder growing large in size again.
Run Manually On The Client
If you want to address the issue only on one client then all you need to do is log on to the client and run the below powershell script.
1 2 3 4 5 6 7 8 |
The above script will now delete any cache that is older than 60 days. If you wish to edit the script to change from 60 days simply replace 60 with the amount of days you need.
Create A Schedule Task
In my experience this is the best solution to implement as this task will run on a schedule and you will not have an issue with the cache folder growing in size again.
Below we will create a windows task schedule and will deploy it via SCCM to all clients.
To implement a schedule task that clears down the sccm cache follow these steps.
-
- Log on to your SCCM server
- Create a folder where you keep your SCCM applications
- Create the below two files in this location
- Create a file called sccm_cache_cleardown.ps1
- Put the below code in to the powershell script
- Next create a file called Create_Task_Scheduler.ps1
- Put the below code in to the powershell script
1
2
3
4
5
6
7
8
9start-sleep -Seconds 300
$TaskName = 'SCCMCacheClearDown'
$Action = New-ScheduledTaskAction -Execute 'C:\Windows\System32\WindowsPowerShellv1.0\powershell.exe' -Argument "-NonInteractive -NoLogo -NoProfile -File 'C:\scripts\sccm_cache_cleardown.ps1'"
$Trigger = New-ScheduledTaskTrigger -AtStartup
$Trigger.Delay = 'PT5M'
$Settings = New-ScheduledTaskSettingsSet -AllowStartIfOnBatteries -DontStopIfGoingOnBatteries -ExecutionTimeLimit (New-TimeSpan -Minutes 10)
$Task = New-ScheduledTask -Action $Action -Trigger $Trigger -Settings $Settings
Register-ScheduledTask -TaskName $TaskName -InputObject $Task -User 'NT AUTHORITY\SYSTEM'
copy-item .\sccm_cache_cleardown.ps1 -Destination C:\Scripts - Replace C:\Scripts if you wish to use another folder for storing the script on the client
- The files for the SCCM application will look like below

- Now we need to create an SCCM application so we can install this on all sccm clients
- Open the SCCM console
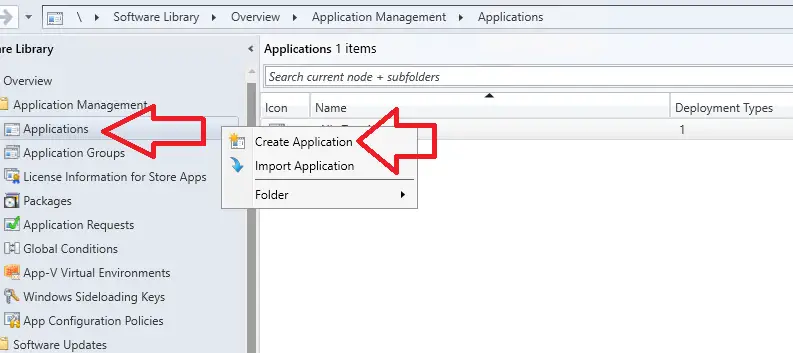
- Go to \Software Library\Overview\Application Management\Applications
- Right click on applications and click create application

- Select “Manually specify the application information”
- Click next
- Give the application a name and click next
- Click next
- Click add
- Select “Manually specify the application information”
- Click next
- Enter the same name here you gave the application
- Click next
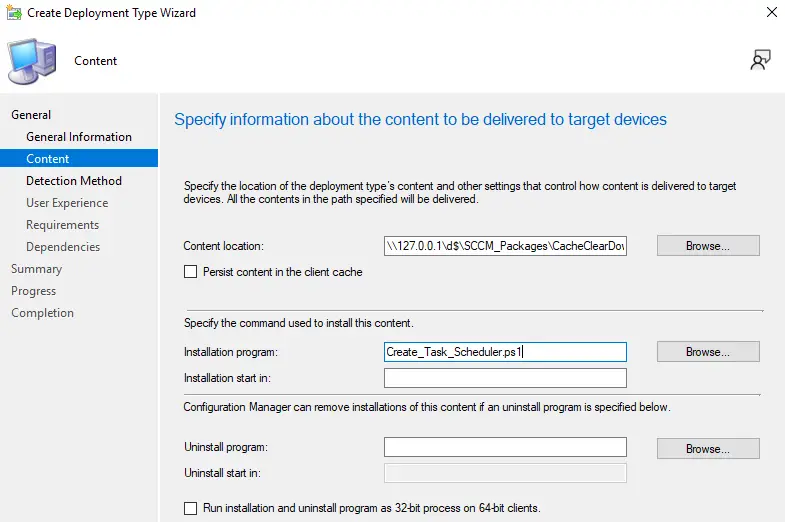
- In content location enter the location of the folder we put the two powershell files in to
- In Installation program enter Create_Task_Scheduler.ps1

- Click next
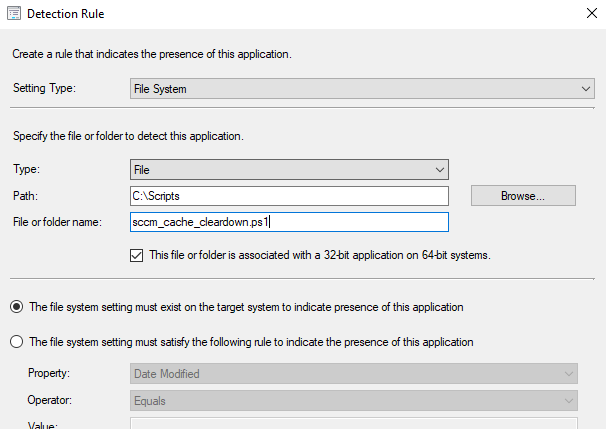
- Click Add Clause
- Add the required rules for application detection, I like to keep is simple and detect if C:\Scripts\sccm_cache_cleardown.ps1 exists

- Click ok
- Click next
- Installation behaviour : Select “Install for system”
- Logon requirement : Select “Whether or not a user is logged on”
- Click next
- Click next
- Click next
- Click next
- Click close
- Click next
- Click next
- Click close
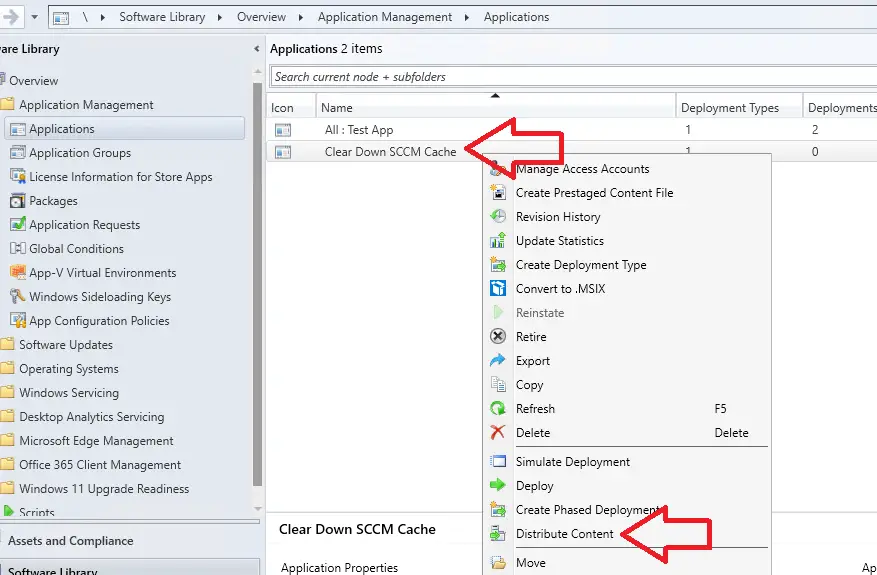
- Right click on the application you just created and select distributed content

- Click next
- Click next
- Click add and select your DPs you want to distribute to
- Click next
- Click next
- Click close


The required SCCM application is now created, I recommend you test the application first on a few test machines before deploying it to all machines.
Run SCCM Clear Down Script In SCCM Console
By adding a script to the SCCM console this will allow us to run this script on bulk on the machines we want.
To set this up follow these steps
- Open the SCCM console
- Go to \Software Library\Overview\Scripts
- Click Create Script
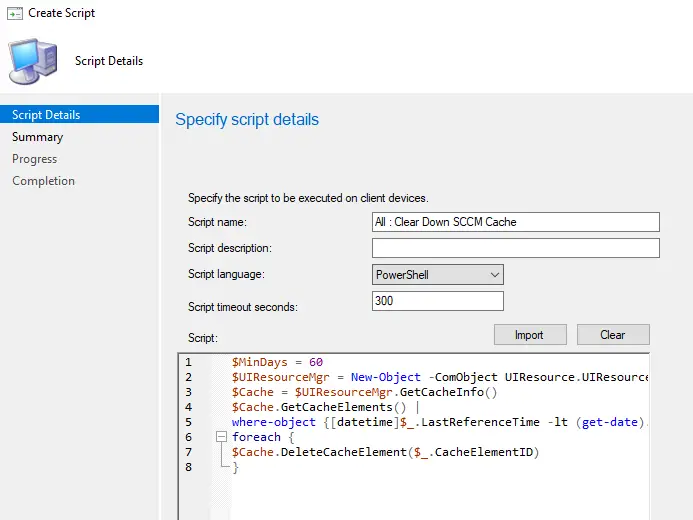
- Give the script a descriptive name
- In timeout enter 300
- In script copy and paste the below code
- Click next

- Click next
- Click close
- Approve the script
- Go to \Assets and Compliance\Overview\Device Collections
- Right click on the device collection you want to run the cache clear down script on
- Select run script
- Highlight the script we created
- Click next
- Click next
- Click next
Frequently Asked Questions
What If Content Is Deleted That Is Needed In The Future?
If an application or software update tries to install and the content has been deleted from the clients cache it will simply re-download the required files from the SCCM server.
What Is The C:\Windows\ccmcache Folder Used For?
When SCCM installs an application or software update on a client it will download the install files in to a local folder in the location C:\Windows\ccmcache then SCCM will run the install command referencing these files.
How To Control The Size Of The C:\Windows\ccmcache folder?
You can control the size of the C:\Windows\ccmcache by setting client policies within the SCCM console, But if you push out software updates via SCCM these updates ignore what the cache folder limit is which is why we are implementing the solution above to clear this folder down on a regular basis.
Does The Above Script Work On All Operating Systems?
Yes, I have used the same script for many years. I have tested this script on, Windows Server 2008, 2012, 2016, 2019, 2022. Windows 7,8,10.